
Thanks for stopping by, I have a simple hand made sign step by step to share today.
I made this sign for one of my better halves best friends who is getting married next month.
The sign was built from wood scraps I had lying around, Decoart Chalk Finish Paints and a Custom Designed Stencil I got made by Lisa from That Craft Place.
Here is what you will need.
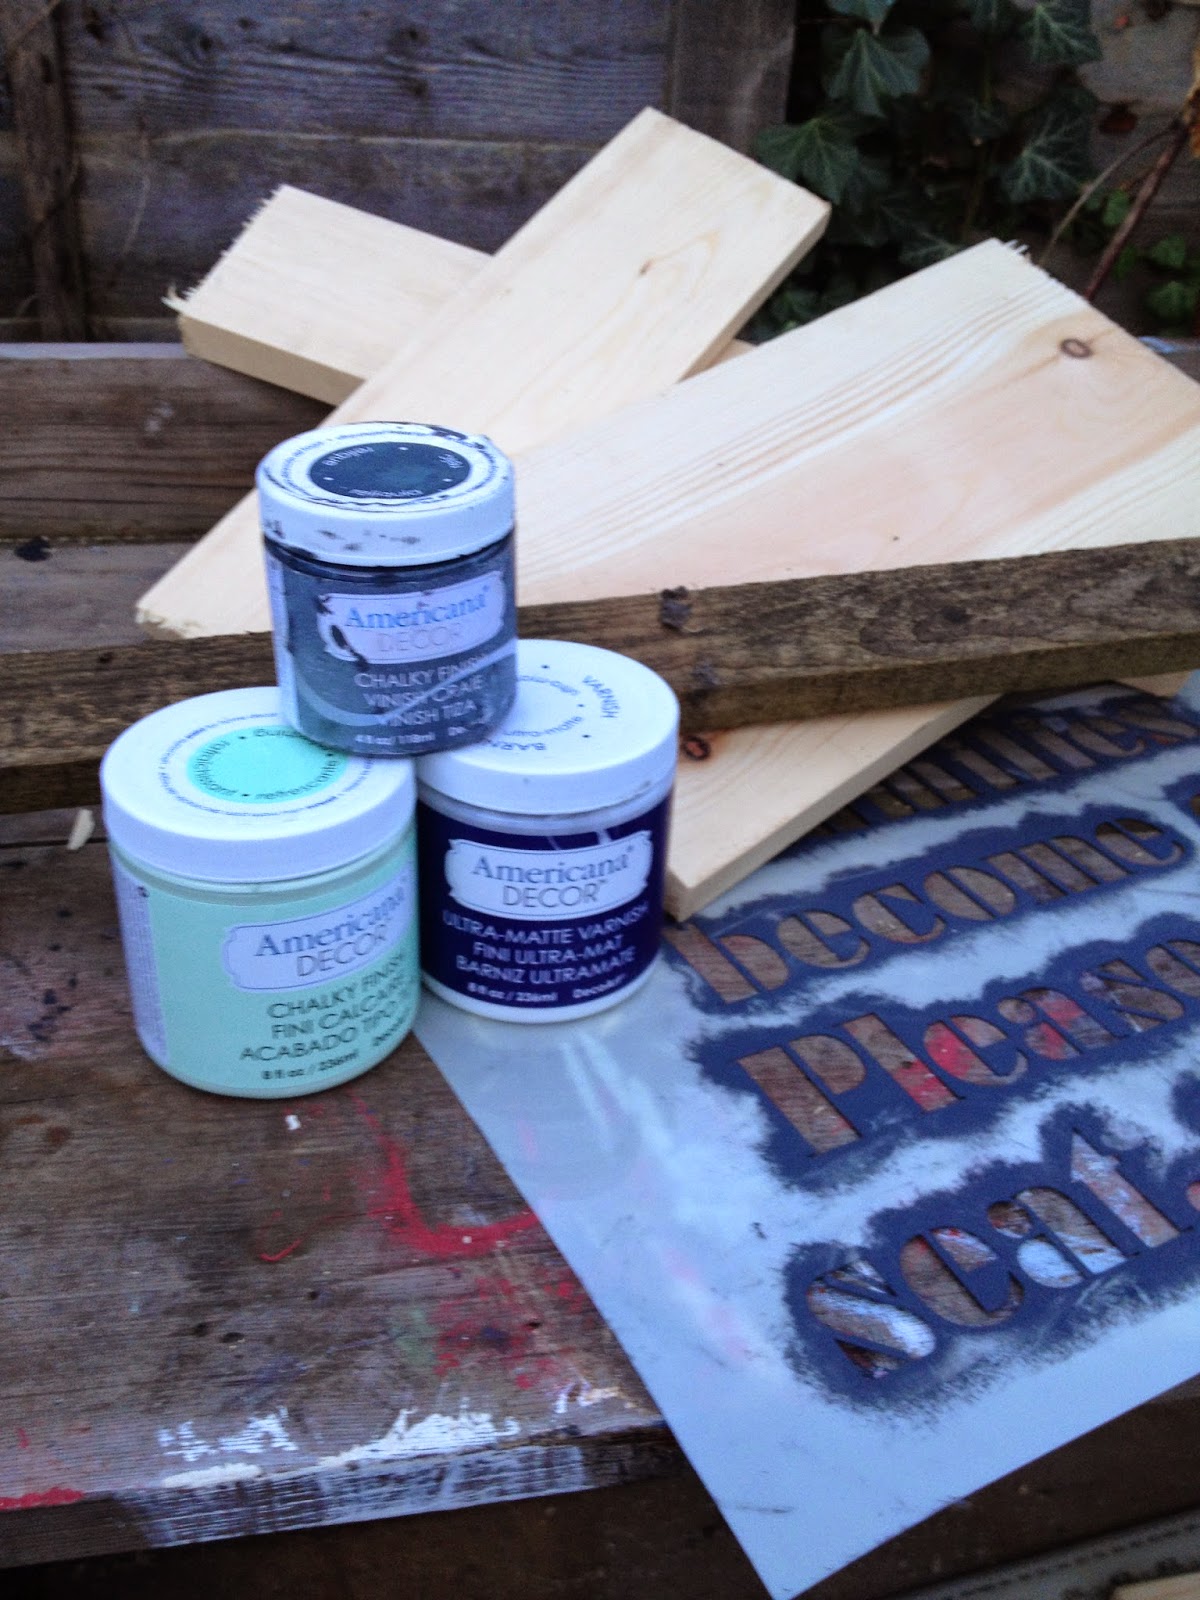
Decoart Chalk Paints..
I used Relic and Refreshing.
Decoart's Ultra Matte varnish.
Stencil.
Wood off cuts, 4" x 1" and 6" x 1" Tile Baton.
Electric Sander..
I have a black and decker mouse.
Medium grade sand paper and Fine grade sand paper
Small Nails and a punch.


Cut your planks and tile baton to size to size. My sign is roughly A3 sized.
Lay the tile baton out to create the back supports and nail the planks to the batons.Use the nail punch to punch the nails below the surface of the wood, this will stop the Sander from catching the nails and leave a nicer finish.


I used Decoart's Relic for the base coat. Once dry sand back with a medium grade sand paper till you reach the level of distress you require.

I used Refreshing for my second colour, painted over everything and once dry sanded back using a medium grade sand paper again keep going till you reach the level of distress you require. Finish of with a light sanding with fine grade sand paper, this will give you a really nice smooth finish.

I used stencil tape to keep my stencil in place and a stencil brush to apply Relic. Using the dark grey tied in with my base colour and is a little less stark than Black.
I stipple with my brush and this leaves the paint quite textured, a very light rubbing with some sand paper by hand will smooth this down and I like to scuff the words up a little to help add to the aged look.
The sign was finished of by applying 3 coats of Ultra Matte varnish.


Now with the popularity of shabby signs popping up pretty much everywhere with absolutely crazy prices you can make your own for a fraction of the cost and have it tailor made with your colour choice and whatever phrase you require, Its also a nice solid piece, no cheap mdf or laser printed piece of rubbish.
Thanks for stopping by. x
Wonderful Mark.
ReplyDeleteIt is good to see the steps you used to make this wonderful sign, the finished result is fantastic and I love those words! Anne x
ReplyDeleteFabulous xx
ReplyDelete