Thursday, 29 January 2015

Steam Punk Shabby Chic Chair and A Pie Crust Table


Morning all, thanks for stopping by, I have the first of a few chairs to share today. In the build up to CHA UK I am working on lots of samples for the Decoart booth, Part of that involves painting several chairs for people to use whilst Andy Skinner and myself do our make and takes at the stand.
The chair was first painted with Decoarts chalk finish paint in Relic.I used a candle and rubbed aling the edges to act as a resist for my top coat. A couple of coats of Primitive over the top for a nice solid coverage.Once dry I took a medium grade sand paper and very lightly sanded the areas I had applied the candle.
To finish I applied 3 coats of decoart's clear cream wax.When the wax is dry you can buff it up for a really soft to the touch, light sheen.


The Pie crust table was painted with Rouge and Delicate with the stencilling done in Carbon.
Rouge was painted first and then heavily distressed with my black and decker mouse.the Delicate was next and again heavily distressed.
The script stencil is from the Chalk finish range and was sanded back by hand to give a very distressed look to match the table. A couple of coats of Decoarts  Ultra Matte varnish were applied to finish the table off.
 
xx thanks for stopping by xx
 

Tuesday, 27 January 2015

Up-Cycling Shabby Chic Class with Decoart Chalk Finish Paints


Thanks for stopping by, another quick post, I just wanted to share some pics and some of the finished pieces that were made in my up-cycling shabby chic workshop I held at the Artistic Stamper towards the end of last year. I would like to thank all of the ladies who came along, I had a great time and loved seeing all the different pieces coming together.
Of course we used the Decoart chalk finish paints and I think you will agree everybody's pieces came out great.
I am happy to say I will be back at the Artistic Stamper a little later this year and I am pleased to say I am holding the Up-cycling workshop with Lisa in Eastbourne at That Craft Place, If you are interested you can find all the details at the top of the page.

Monday, 26 January 2015

2 More Shabby Coat Hooks.


Thanks for stopping by, I quick post today but more posts to come very soon as I am currently gearing up for the Uk CHA trade show where I am going to be demonstrating the Decoart Chalk Finish Paints for Decoart, if you are at the show please stop by and say hi.
This post really follows on from the previous post with the step by step on how to get this finish. You can find it HERE.
Again I have used the Decoart Chalk Finish Paints.
For the Fleur De Lis I used Legacy and Escape for the blues and Everlasting for the Fleur De Lis, I used a stencil from the chalk finish line.
For the owl hook I used Enchanted,cammeo and inheritance with carbon for the stencilling, the stencil is also from the chalk finish line. Both coat hooks were given a couple of coats of Decoarts soft satin varnish.
 
Thanks for stopping by, Ill be back soon with some pics from my up-cycling shabby chic workshop I held at the Artistic Stamper at the end of last year, I will be back there a little later on this year and I will be holding the up-cycling workshop with Lisa in Eastbourne at That Craft Place.
If you are interested you can find a full class schedule at the top of the page.
Thanks for stopping by xx


Wednesday, 12 November 2014

Shabby Coat Hook How Too


Another quick step by step today. Our move is getting closer and closer and working on smalls is about as much as I can do at the moment. 
 I picked up these lovely coat hooks a little while ago and thought it was about time I did something with them. 
 Here is what you will need.

Decoart chalk finish paint and varnish
Coat hooks. 
Off cut of wood. 
Electric sander (not essential but makes life easier). 
Decoart chalk finish stencil. 
Brushes. 

To start with I painted the board with Decoarts chalk finish paint in Escape. 
Once dry I painted over the top with Decoarts Lehacy. 


Once dry a quick sand starting with a medium grade sand paper and working down to a fine grade paper to leave a beautifully smooth surface. 


Once you are satisfied with your level of distress. You want to find a happy medium of bar wood and both colours coming through. It's time to add the stencilling. Take some time to make sure the stencil is straght and I find it best to tape it down. This helps keep it in lace and helps stops the paint from getting under the stencil. I use a stencil brush and stipple the paint. This gives the paint some texture. When dry take a fine grade piece of sand paper and gently sand back to smooth out and distress the design. I used Decoarts Enchanted for my stencilling. 
Finish off with a couple of coats of varnish. I used the satin varnish to give a nice soft sheen. 


Measur and mark where you want the hooks and attach them to the board. 


Thanks for stopping by xx


Friday, 7 November 2014

A Candle Stick Make Over Decoart Chalk Paints And Mixed Media Fluid Acrylics Step By Step Ageing


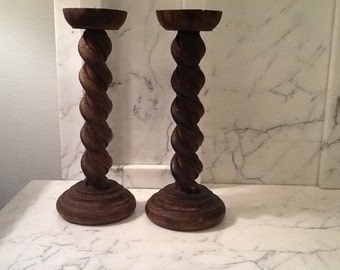
Afternoon all, I hope you are keeping well. With today's post I have done my usual stupid thing of not taking a before pic so I have improvised and found a picture that shows roughly the colour and finish of this wooden candle stick holder that I picked up in a charity shop, It was originally from Debenhams.


Ok, not the same but mine was the same dark brown colour and this is just to give you an idea of where I started ;)


Step one.
 The candle stick was given a good clean, with the Decoart Chalk Finish Paints you just need to make sure the surface is clean, the only sanding or prep work you would need to do is if the surface is flaky and lose.
Once clean I gave it two coats of Yesteryear to get a nice solid finish, The first coat can sometimes be thin and streaky especially if the surface is a high gloss, don't worry the first coat goes on and once dry gives the surface some tooth ready for the second coat.
A coat of Decoart's clear wax was then applied to seal the surface.Decoart's wax is a cream wax and non solvent based unlike many other chalk paint manufacturers so you can use it indoors with out getting headaches.


Step 2
I wanted a more aged look to my candle stick and using the Dark Wax from Decoart is the easiest way.If you want to use the darker waxes it is important to put a layer of clear wax on first other wise the dark wax can cause staining to the paint.I work fairly quickly with the dark waxes and I don't worry to much about brush strokes and direction, just make sure it is applied in all the low and hard to reach spots as this is where dirt will naturally collect over time.
Have some kitchen towel handy, with a piece this size by the time you get to the bottom with the dark wax you can start wiping it away. Keep removing the wax till you get the look you desire, If you take to much off you can simply apply more and repeat.
Let the wax dry thoroughly and to get a nice sheen to the finish buff with a clean colour free cloth.


Step 3.
I wanted a to take my ageing a step further and using the Decoart Media Fluids Carbon Black and Quinacridone Gold I added a couple of colour washes. The Media fluids are an artist quality pure pigment paint, no filler or bulking agents of any kind, this means they hold their colour even when heavily diluted, making them perfect for colour washes amongst many other mixed media and artistic ventures. You can find more projects with the media line on my other blog Speshink.


Thanks as always  for stopping by, your support is very much appreciated. xxx